Day 1: Setting Up the Environment

Remember all those awesome Rust features we've been talking about? Well, before we dive deeper, it's time to set up your very own Rust coding workspace. There are a few ways to do this, each with its own advantages. Let's have a look at them 🦀
Rust Playground
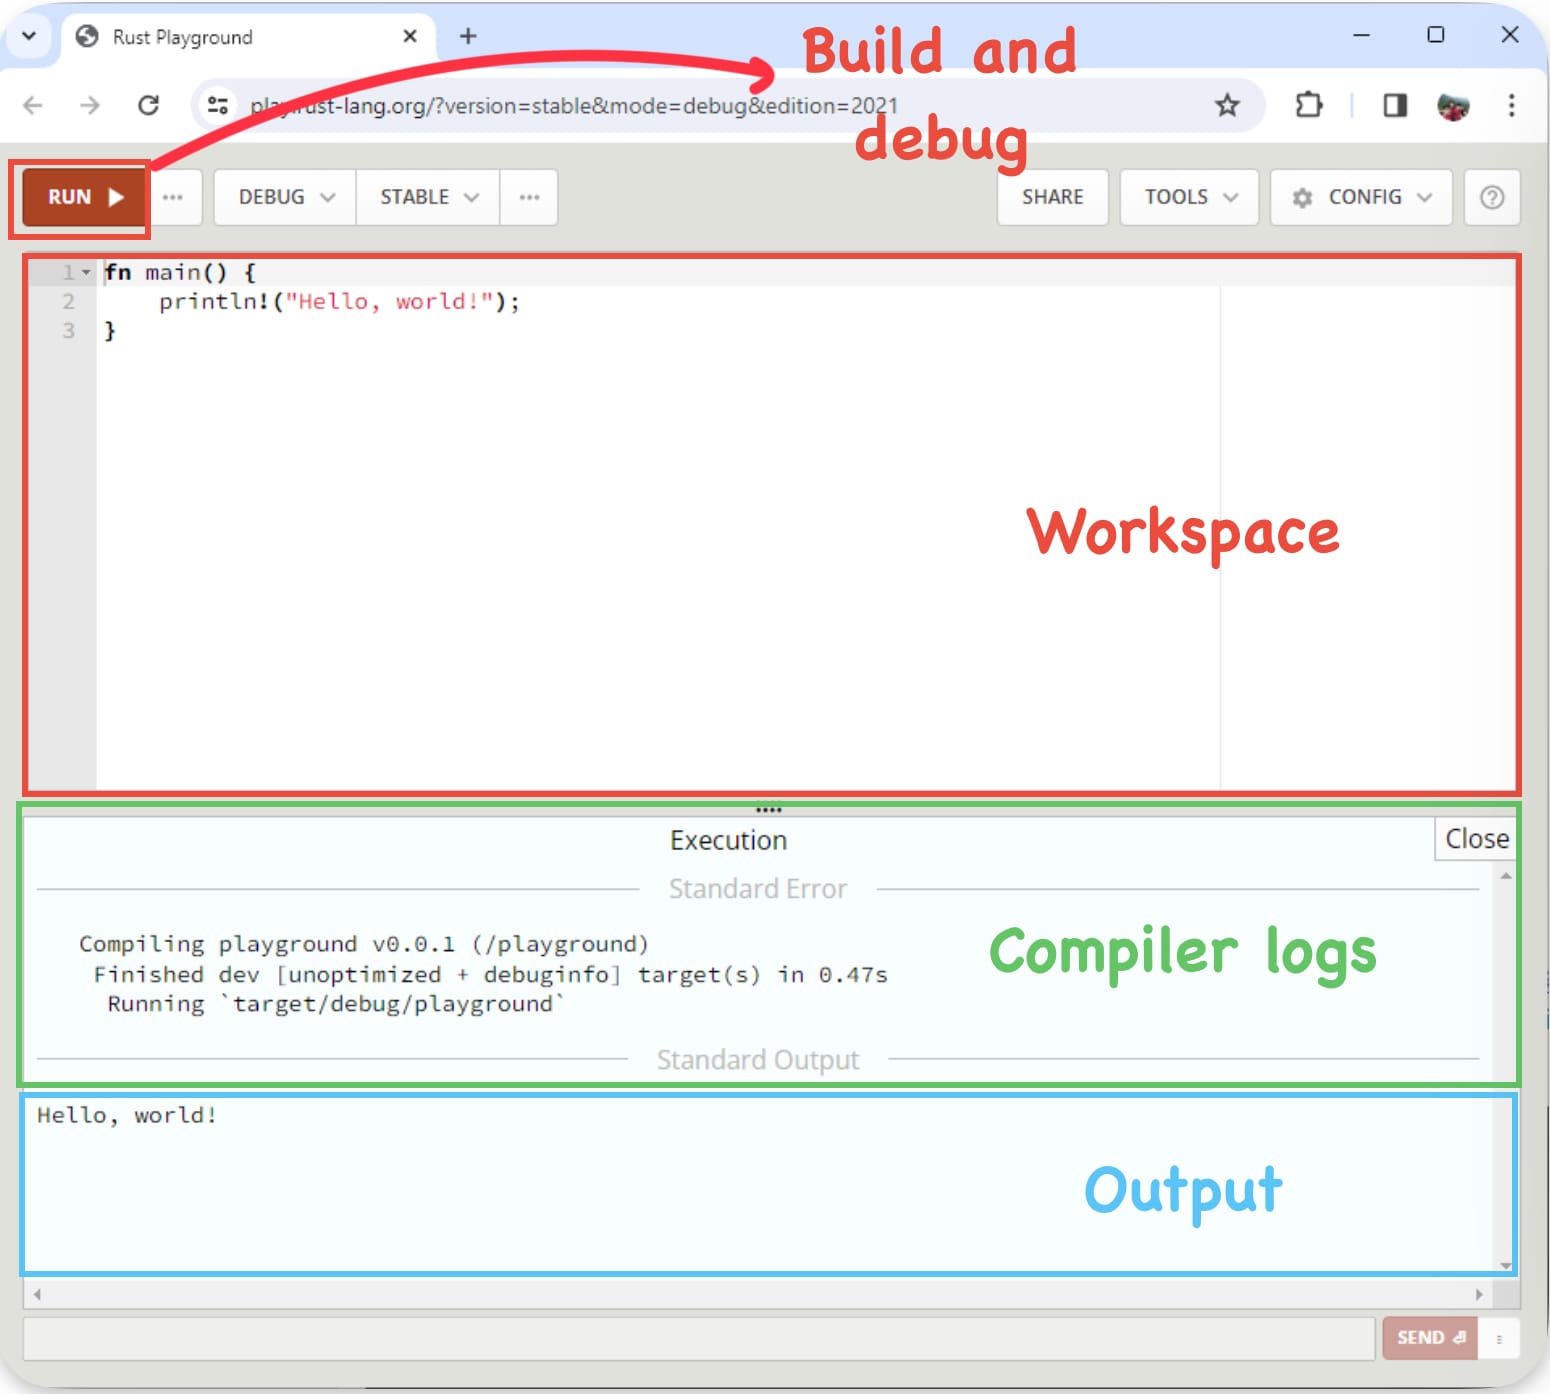
The easiest way to dip your toes into Rust is using the Rust Playground. It's a fantastic online sandbox built by the Rust community for experimenting with the language. Think of it as your Rust test kitchen – you can write code snippets right in your browser without any setup. This makes it perfect for trying things out, following examples, or just getting a feel for how Rust works. It even has neat features like sharing your code snippets!
However, if you're building anything serious (multiple files, custom scripts, etc.), you'll eventually need a more powerful setup. But don't worry, the Playground is a perfect starting point, especially for the examples we'll cover in this article series. For more information, visit the Rust Playground help page.

Local Installation
Okay, we've had fun with the Rust Playground, but that's just for tinkering! For serious projects, we need a powerful local setup.
Let's focus on getting Rust set up on a Unix-like machine. This covers Linux and macOS, and potentially Windows if you're using WSL (Windows Subsystem for Linux). Think of WSL as a way to run a mini Linux environment right within Windows. Cool, right? If you'd rather install Rust natively on Windows, that works too.
We'll use a handy tool called Rustup. It's the official way to install, update, and manage Rust. The Rust community maintains Rustup for Unix and Windows environments. One extra note for Windows users: You'll also need the Visual Studio build tools and for Linux users: you will need to install a C compiler (like GCC) for linking your Rust code to the operating system. Don't worry, the Rust installer will guide you if needed. The Rust folks are working on getting rid of those extra dependencies in the future!
I will cover the installation step that is the most complex of all mentioned above ie Rust on windows with WSL.
Steps for Installing Rust on WSL
- Set up WSL: If you haven't already, install a Linux distribution on WSL. Ubuntu is a popular choice. Microsoft has some great guides on how to do this: https://learn.microsoft.com/en-us/windows/wsl/install
- Install Rustup: Open a WSL terminal and run this command: curl --proto '=https' --tlsv1.2 -sSf https://sh.rustup.rs | sh. Select Option 1 Proceed with installation and wait for the installation to complete.
- Source the generated environment file to add rust compiler to the Path.
You can verify the installation by running rustc --version on the terminal.
Installing RUST on UNIX like platform (Linux, Macos)
VS Code + WSL
VS Code is a fantastic code editor, and it works super smoothly with WSL.
- Install VS Code on your main Windows machine: https://code.visualstudio.com/
- Install the "Remote - WSL" Extension (search for it in the VS Code extensions marketplace).
- Connect to WSL: VS Code makes this simple! Look for a green button in the bottom-left corner of your VS Code window and click connect to WSL.
Connecting VS code to WSL
Using Github codespaces
Okay, we learned how to set up WSL and install Rust using Rustup. That's awesome! But, if you want a super-fast setup and a powerful work environment without all those steps, we've got you covered.
We've set up a special GitHub repository just for this "30 Days of Rust" series that can be accessed via https://github.com/inpyjama/rust. Not only does it have all the code examples, but we've also enabled it with GitHub Codespaces! Think of Codespaces as a cloud-based coding environment, pre-loaded with everything you need to follow along.
Codespaces lets you code directly from your browser within a full-fledged vs code based development environment. It's like having a powerful computer in the cloud – no setup on your local machine needed!
Connecting to Codespaces
- Go to the inpyjama/rust repository on GitHub (I'll give you the link).
- Spot the green "Code" button and open its dropdown menu. You should see an option for Codespaces.
- Click the Codespaces option, and it'll spin up your cloud coding environment.
If you prefer using your local VS Code, connecting to GitHub Codespaces is just as easy as connecting to WSL. Note that you need to sigin to vscode using your github account for this to work.
Setting up Github Codespaces
Connecting Vs code to github code spaces
Fantastic! We've got our development environment all set up. Now, it's time to dive into the exciting world of Rust and learn how those programs actually work. See you in the next article 🦀

Discussion